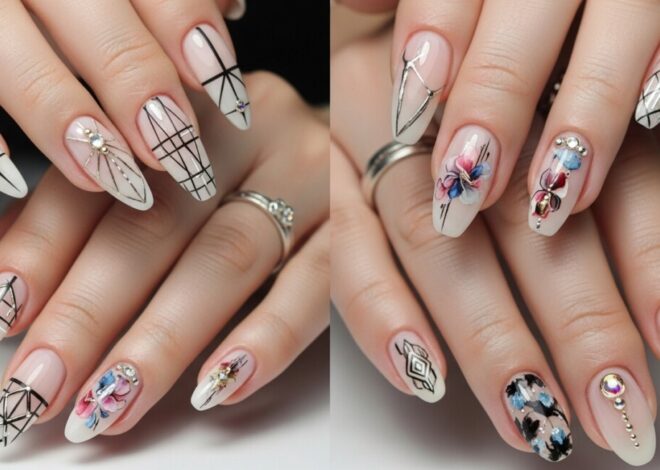

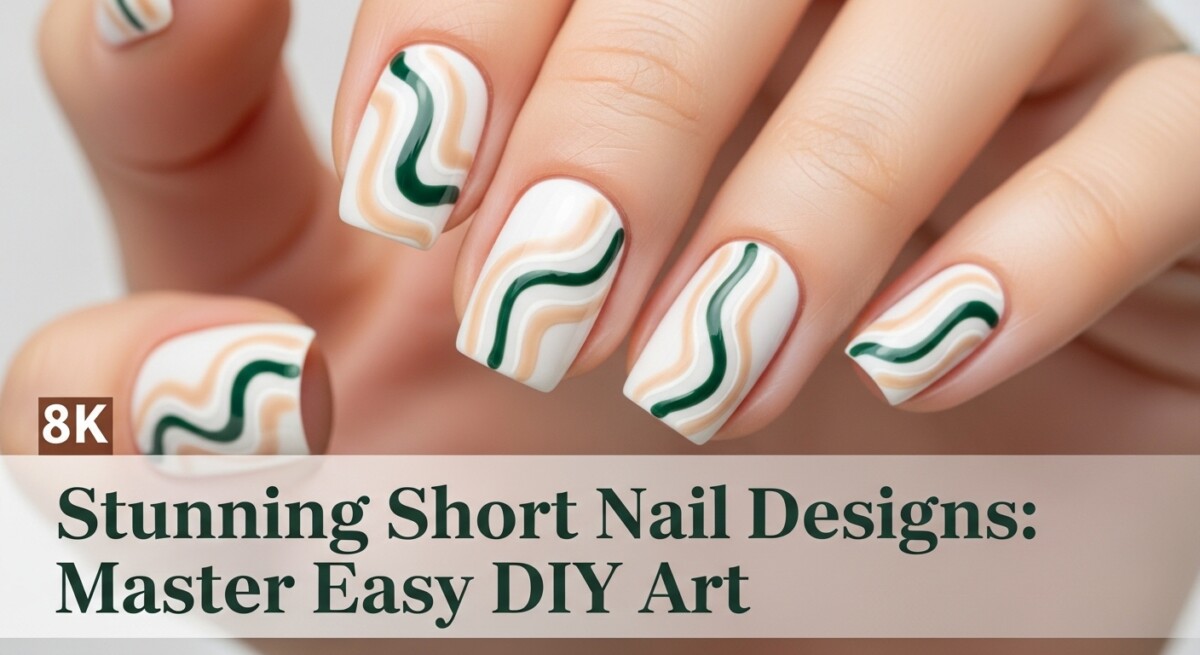
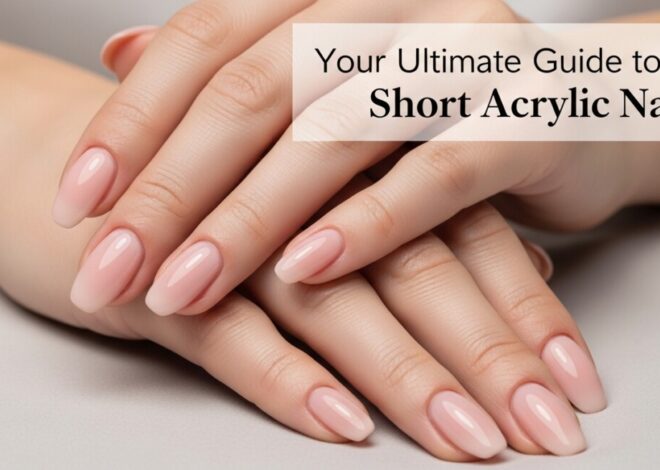
Stunning Short Nail Designs: Master Easy DIY Art
Gone are the days when intricate nail art was reserved exclusively for long, dramatic talons. In fact, some of the most stunning and chic looks today are achieved on shorter nails! If you’re searching for “nail designs for short nails” that are not only easy to create at home but also exude a professional, high-fashion vibe, you’ve come to the right place. Short nails are practical, elegant, and provide a perfect canvas for sophisticated artistry. This comprehensive guide will equip you with the inspiration, tools, and step-by-step instructions to transform your short nails into miniature masterpieces.
Why Short Nails are Perfect for Art
Short nails offer a myriad of advantages that often get overlooked in the pursuit of length. They’re less prone to breakage, more hygienic, and incredibly functional for everyday life. But beyond practicality, short nails are a canvas of understated elegance, making them ideal for refined nail art. The beauty industry has fully embraced this trend, proving that less can indeed be more.
Many perceive short nails as limiting, but we’re here to debunk that myth. The compact surface encourages creativity through precision and thoughtful design placement. Instead of sprawling patterns, you focus on impactful, condensed aesthetics that catch the eye without being overpowering. This is where truly professional-looking nail designs for short nails shine!
The Myth of Limitations Debunked
The misconception that short nails limit your artistic options couldn’t be further from the truth. In fact, the confined space often inspires more clever and sophisticated designs. Think minimalist lines, elegant negative space, and perfectly placed accents that would get lost on a longer nail. Short nails provide a fantastic opportunity to experiment with texture, subtle gradients, and delicate patterns that truly pop. They make maintaining your look easier and chip repair less daunting, allowing you to enjoy your beautiful nail art for longer.

Essential Tools & Prepping Your Canvas
Before diving into the creative process, ensuring you have the right tools and a perfectly prepped nail canvas is crucial for achieving professional results. Good preparation is the foundation of any long-lasting and beautiful nail art, especially for nail designs for short nails.
Gather Your Supplies
- Base Coat: Protects your natural nail and helps polish adhere.
- Top Coat: Seals your design, adds shine, and increases longevity.
- Nail Polish Colors: A variety of shades, including a good nude or white.
- Dotting Tools: Essential for polka dots and precise details. (You can also use a bobby pin or toothpick.)
- Thin Nail Art Brushes: For lines, intricate patterns, and fine details.
- Painter’s Tape or Nail Vinyls: For creating clean lines and geometric shapes.
- Acetone/Nail Polish Remover: For corrections and clean-up.
- Cotton Swabs & Lint-Free Wipes: For precise clean-up.
- Orange Wood Stick or Cuticle Pusher: For proper cuticle care.
- Nail File & Buffer: To shape and smooth your nails.
Perfecting Your Prep Routine
A flawless manicure starts with meticulous preparation. This step ensures your nail designs for short nails look professional and last.
- Shape and File: Trim and file your nails to your desired short shape (square, oval, squoval). Ensure all nails are uniform in length and shape.
- Cuticle Care: Gently push back your cuticles with an orange wood stick or cuticle pusher. Avoid cutting them, as this can lead to infection.
- Buff: Lightly buff the surface of your nails to create an even texture for polish application.
- Cleanse: Wipe your nails with an alcohol-soaked lint-free pad to remove any oils, dust, or residue. This ensures better polish adhesion.
- Base Coat: Apply a thin, even layer of base coat to all nails and let it dry completely.
Chic & Simple: Our Top DIY Nail Designs for Short Nails
Now for the fun part! Here are some of the easiest yet most professional-looking nail designs for short nails that you can master at home, even if you’re a beginner.
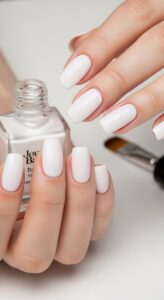
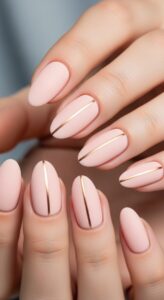
1. The Elegant Minimalist Line
This design proves that simplicity is often the ultimate sophistication. A single, perfectly placed line can elevate your short nails dramatically. It’s a chic and modern choice for nail designs for short nails.
- Apply two coats of your chosen base color (nude, white, or a light pastel works beautifully). Let dry completely.
- Using a thin nail art brush or a striping tape, apply a single, straight line across the nail. You can place it vertically, horizontally, or diagonally. Experiment with metallic polishes for extra flair.
- Once dry, seal with a glossy top coat.
2. Sophisticated Half-Moons
Also known as a ‘reverse French manicure,’ the half-moon design highlights the lunula (the white crescent at the base of your nail) with a contrasting color. This is a timeless and elegant option for nail designs for short nails.
- Apply a base color. This will be the color of your half-moon. Let dry.
- Carefully apply a small, round reinforcement sticker or a piece of painter’s tape to create the half-moon shape at the base of your nail.
- Paint the rest of your nail with a contrasting color.
- Remove the sticker/tape while the polish is still wet.
- Finish with a top coat.
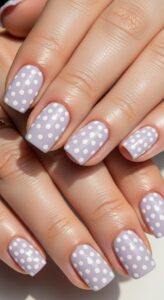
3. Playful Polka Dots
Polka dots are universally loved and incredibly versatile. They can be playful or chic, depending on your color choice and dot size. This is one of the easiest nail designs for short nails to master.
- Apply two coats of your base color and let dry completely.
- Dip a dotting tool (or the tip of a bobby pin) into a contrasting polish.
- Gently press the tool onto your nail to create dots. You can do a single large dot, a cluster, or a uniform pattern.
- Allow to dry, then apply a top coat.
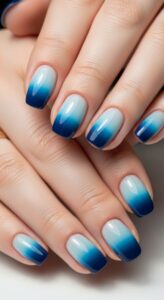
4. Gradient Glam
A subtle ombre or gradient effect can add immense depth and sophistication to short nails. It’s a popular choice among various nail designs for short nails for its elegant visual appeal.
- Paint your nails with a light base color.
- On a makeup sponge, apply two to three shades of polish side-by-side that blend well together (e.g., light pink, medium pink, dark pink).
- Lightly dab the sponge onto your nail, rocking it slightly to blend the colors.
- Repeat until you achieve your desired opacity and blend.
- Clean up any polish around your cuticles with a brush dipped in remover.
- Finish with a generous layer of top coat to smooth out any texture.
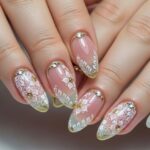
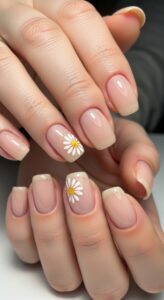
5. Delicate Floral Accents
Even on short nails, a delicate floral motif can look incredibly elegant and feminine. Think minimalist blooms rather than sprawling gardens.
- Apply a light, neutral base color (e.g., sheer nude or white). Let dry completely.
- Using a fine nail art brush and a contrasting polish, paint tiny petals to form a small flower, perhaps just one or two on each nail, near the cuticle or off-center.
- Add a dot of a different color in the center of each flower using a dotting tool.
- Allow to dry and seal with top coat.
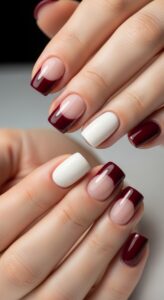
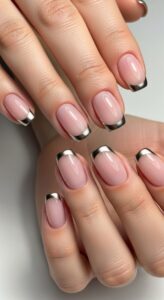
6. The Classic French (with a Twist)
The timeless French manicure gets a modern update for short nails. Instead of a thick white tip, opt for a very thin line or a colored tip for a contemporary twist.
- Apply a sheer pink or nude base coat. Let dry.
- Using a very fine brush or nail art pen, carefully draw a thin line of white (or a bold color like black, silver, or even neon) across the very tip of your short nail.
- For a perfectly straight line, you can use French tip guides or painter’s tape, ensuring the line is barely visible on the short length.
- Finish with a glossy top coat.
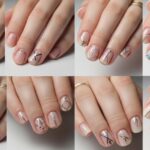
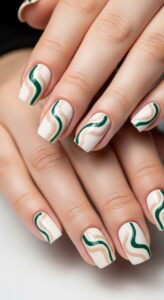
7. Abstract Swirls
Embrace your inner artist with abstract swirls! This design is incredibly forgiving and looks effortlessly chic on short nails, making it a fantastic option for unique nail designs for short nails.
- Apply two coats of a solid base color (a neutral or pastel works great). Let it dry completely.
- Using a fine nail art brush, draw organic, flowing swirl patterns on your nails. You can use one contrasting color or several complementary shades. Don’t aim for perfection – the beauty is in the abstract nature!
- Let the swirls dry, then apply a clear top coat to seal your artistic creation.
Pro Tips for Flawless Short Nail Art
Beyond the designs themselves, adopting a few professional habits will ensure your DIY nail designs for short nails look salon-worthy every time.
Patience is Your Best Tool
Rushing through your manicure is the quickest way to smudges and uneven lines. Allow each coat of polish to dry thoroughly before applying the next. This prevents bubbling, streaking, and ensures crisp lines for your art.
Practice Makes Perfect
Don’t get discouraged if your first attempt isn’t perfect. Nail art, especially fine details on short nails, requires practice. Start with simpler designs and gradually work your way up to more intricate patterns. Remember, every expert was once a beginner.
Don’t Skimp on Top Coat
A good quality top coat is non-negotiable. It not only adds a beautiful high-gloss finish but also protects your design from chipping and fading. Reapply a thin layer every two to three days to extend the life of your manicure.
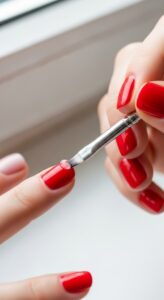
Clean Up Your Edges
Even the most stunning nail art can be ruined by messy edges. Dip a small, flat brush (like an eyeliner brush) into nail polish remover and carefully clean up any polish that has gotten onto your skin around the cuticles and sidewalls. This step makes all the difference in achieving a professional finish for your nail designs for short nails.
Maintaining Your Masterpiece
To ensure your beautiful nail designs for short nails last as long as possible, a little maintenance goes a long way. Wear gloves when doing household chores or washing dishes. Keep your hands moisturized, paying special attention to your cuticles. A good cuticle oil will keep them healthy and prevent cracking, which can compromise your manicure. Reapplying a top coat every few days will also significantly extend the life and shine of your DIY nail art.
Conclusion: Embrace Your Short Nail Style
As you can see, short nails are far from limiting; they are a sophisticated canvas brimming with artistic potential. From minimalist lines to playful polka dots and elegant French twists, the world of “nail designs for short nails” is vast, accessible, and ready for your creative touch. With a little practice, the right tools, and these easy DIY techniques, you can achieve professional-looking nail art right from the comfort of your home. So, go ahead, pick up your polishes, and let your short nails tell a beautiful story. Happy painting!
What are your favorite short nail designs? Share your thoughts and creations in the comments below!

One thought on “Stunning Short Nail Designs: Master Easy DIY Art”